

I’ve always enjoyed introducing hikers to Devils Postpile because almost no one expects to be impressed. The monument occupies less than 800 acres and offers only two major hikes. Then visitors round a bend, stare up at the towering basalt columns, and suddenly understand why this corner of the Sierra earned national monument status.
No doubt how it got its name: a wall of towering, dark rock columns that looks as if the old devil himself had stacked a mighty pile of posts fresh from his cosmic lumberyard. Geologists, less colorful but more precise, explain it as a textbook-perfect example of columnar basalt, formed when ancient lava cooled and cracked into geometric columns. As if that weren’t enough, glaciers later shaved off part of the wall and polished the top smooth, leaving behind a surface that looks for all the world like a tiled floor laid by Greek stonemasons.
The other star attraction is Rainbow Falls, a dramatic 101-foot plunge of the Middle Fork of the San Joaquin River. Spray and sun often combine here to paint a rainbow across the canyon — a sight that has been pulling hikers downstream from the Postpile for generations.
Devils Postpile is a place where you can see the highlights in a single day, then, if your boots are still restless, continue into the high-country trails of the Ansel Adams Wilderness, where the Pacific Crest and John Muir trails run like veins through granite and meadow.
Agnew Meadows and Devils Postpile
Some 100,000 years ago, lava poured into this valley and cooled slowly enough to contract into hexagonal columns, like a bundle of giant stone pencils standing on end. A later glacier sheared off the columns, leaving behind the 60-foot-high wall you see today. Nowhere else in California is the volcanic story told with such precision and drama
Devils Postpile is one of the world’s best examples of columnar basalt. About 100,000 years ago, lava pooled in this valley. As it cooled, the lava contracted and cracked into mostly six-sided columns, though fours, fives, sevens, and other polygons sneak in too. Later glaciers cut the wall to expose 60-foot-high columns and polished the top smooth.
The Postpile measures about 900 feet long and 200 feet high — roughly the size of the Acropolis in Athens — and looks every bit as imposing.
The Postpile wasn’t always so revered. Early 20th-century miners proposed dynamiting the formation to dam the river and generate hydroelectric power. Luckily, naturalists and conservationists rallied, and in 1911 President Taft declared the site a national monument. Today, hikers can not only marvel at the face of the Postpile but also climb a short spur to its top, where the fractured hexagons look like a man-made mosaic.
I’ve always thought this 7.5-mile point-to-point hike deserves more attention than it gets. Beginning at Agnew Meadows and ending at Reds Meadow Resort, the trail strings together a gallery of Sierra landscapes: broad alpine meadows, shady Jeffrey pine forests, the glassy Middle Fork of the San Joaquin, strange volcanic flats, and—of course—the famous wall of Devils Postpile.
Along the way you can slip off-trail for a swim in clear pools, picnic on granite slabs, or detour to Minaret Falls, where the river plunges in a foaming sheet. The path winds through Pumice Flat, a surreal white expanse left by past eruptions, and finally delivers you into the rustic charm of Reds Meadow Resort. Thanks to the mandatory shuttle system, it’s easy to hike one-way, avoiding the need to backtrack.
Agnew Meadows to Devils Postpile is a hike that connects threads of history, geology, and wild beauty. The Postpile itself may be the headline, but the whole route reads like a love letter to the Sierra Nevada.
Rainbow Falls
Somewhere over the rainbow is the Middle Fork of the San Joaquin River, which plummets over a rock ledge. Rainbow Falls is a crowd-pleaser, but don’t let the popularity scare you off. There’s good reason thousands of hikers make the 5-mile round trip pilgrimage each summer. Unlike most High Sierra hikes, this one begins with a gentle descent rather than a lung-busting climb. You’ll stroll through lodgepole pines, follow the river’s wandering course, and then—just when you’re lulled by the pleasant pace—you’ll hear the steady thunder ahead. That’s usually the moment when I know the hike is about to get better.
The falls themselves are an unforgettable sight. The San Joaquin River leaps in a single broad curtain over a basalt ledge into a rocky bowl. On sunny days, mist rising from the plunge pool catches the light, painting arcs of color across the spray. The “rainbows” that give the falls their name aren’t rare events—they’re nearly guaranteed at midday in summer. Photographers jockey for position, but many visitors simply sit on the rocks, cooling off in the mist and savoring the spectacle.
Rainbow Falls owes its existence to a quirky twist of geology. Ages ago, the San Joaquin shifted west, carving a temporary channel through cliffs, only to later abandon it and leap back into its original course. That leap became Rainbow Falls, a geologic encore still applauded today.
This is more than just a walk to a waterfall. Along the way, you’ll pass through a recovering burn zone from the 1992 Rainbow Fire. Blackened snags mix with young pines and colorful wildflowers, a vivid reminder of fire’s role in Sierra ecology. The views are more open now, with broad glimpses of Ritter Range peaks and Mammoth Mountain.
For those seeking a longer day, the trail continues beyond Rainbow Falls to Lower Falls, a broad cascade with pools perfect for summer wading. Or, start your adventure from the alternate trailhead near Reds Meadow Resort to trim mileage. Either way, the falls are the prize: a living rainbow at the end of a forest walk.
Know Before You Go
Hiking here requires some planning. Visit my site and learn more about Devils Postpile National Monument. In summer, private cars aren’t allowed down the narrow Reds Meadow Road; instead, a shuttle bus ferries visitors to the monument, Rainbow Falls, Agnew Meadows, and other trailheads.
Few things in nature stop us in our tracks quite like a waterfall.
Maybe it’s the thunder of water meeting stone. Maybe it’s the cool mist on your face after a long climb. Or maybe it’s something less measurable—the way falling water seems to reset the mind, quiet the noise, and remind us why we go outside in the first place.
In California, we’re spoiled.
From year-round cataracts that roar through volcanic canyons to ephemeral springtime ribbons that vanish as quickly as they appear, our state parks offer a gallery of falling water in every form imaginable. Some are world-famous—President Theodore Roosevelt called Burney Falls “the eighth wonder of the world.” Others require a bit more wandering, a willingness to follow a trail just to see what’s around the bend.
That’s part of the appeal.
This week, I’m sharing ten of my favorite waterfall hikes in California State Parks—ranging from thundering showstoppers to quiet, seasonal surprises. And yes, narrowing it to ten was an act of discipline. There are at least ten more waiting in the wings.
For now, lace up.
We’re heading for the sound of falling water.
Burney Falls: Hike to the “Eighth Wonder of the World”
President Theodore Roosevelt once proclaimed Burney Falls “the eighth wonder of the world.” A bold claim, but one look at the 129-foot curtain of whitewater—two great cataracts flanked by dozens of shimmering plumes springing straight from the rock—and you realize he wasn’t exaggerating much. Burney Falls isn’t just another waterfall, it’s a spectacle, a showstopper.
For decades it was a bit of an out-of-the-way wonder. Travelers had to seek it out, winding along Highway 89 north of Lassen. That all changed in the 2020s, when Burney Falls went viral on TikTok. Instagrammers struck poses in the mist, videos racked up millions of views, and suddenly the “eighth wonder” was attracting the kind of crowds usually reserved for the Magic Kingdom. So many visitors clogged the highway and pounded down the trails that California State Parks shut down access in 2024, citing “erosion from high visitation”—a very polite way of saying the internet broke the falls.
But Burney Falls has been drawing awe long before hashtags. Native people considered the site sacred. The Ilmawi, a band of the Pit River Tribe, held villages nearby and believed the falls to be a place of spiritual power. Later, hydroelectric developers saw it as a literal power spot, aiming to harness Burney Creek. Pit River Dam Number Three created Lake Britton downstream, but the falls themselves were saved from development thanks to local rancher Frank McArthur, who in 1922 donated the land to the state. The park honors his pioneer parents, John and Catherine McArthur.
Roosevelt wasn’t alone in his wonder. Early park promoters called the falls “California’s own Niagara,” a stretch perhaps, but you can see the impulse. Hike 1.75 miles, stand at the overlook on a summer’s day and watch the sun light the spray into rainbows while cool canyon mist washes over you—it does feel like another world.
McWay Falls: Big Sur’s Big One
Every hiker has their “wow” moment, and McWay Falls is one of mine. Imagine this: a 100-foot ribbon of water tumbling from granite cliffs directly into the Pacific, framed by turquoise surf and the rugged Big Sur coast. If that doesn’t land it on The Trailmaster’s List of Top Ten Romantic Hikes in California, I don’t know what does. It’s the kind of scene where couples propose, poets pause mid-sentence, and photographers feel they’ve died and gone to heaven.
For most travelers, “Big Sur” means Pfeiffer Big Sur State Park, but ten miles south lies this smaller jewel—Julia Pfeiffer Burns State Park. Don’t skip it. In just over four square miles, you’ll find a redwood grove, dramatic headlands, secluded coves, and coastal views that make you shake your head in disbelief. And of course, that waterfall.
The park honors Julia Pfeiffer Burns, a Big Sur pioneer who ran cattle with her husband, John Burns, on steep mountain slopes that today seem fit only for condors and mountain lions. She was remembered for her grit, her kindness, and her fierce devotion to the Big Sur backcountry. Her name lives on here, thanks in part to the wealthy Lathrop and Helen Brown, who built a home (Waterfall House) on this land in the 1940s, then donated it to the state with the wish that the park be named after Julia.
From the park’s day-use lot, you can sample two short trails: the famed McWay Falls Trail and, just up the road, the Partington Cove Trail, where a narrow tunnel leads to a rocky inlet once used by smugglers and later by loggers to load redwood lumber onto schooners. Together, they offer a compact but unforgettable taste of Big Sur’s wild spirit.
Footnotes
A waterfall is beautiful, a hiker fall is not. Check out The Trailmaster’s Tips for Waterfall Safety.
One of California’s most dramatic coastal parks—and one of its best hikes.
If spring has a signature color along the Central Coast, it’s gold.
At Montaña de Oro, the bluffs don’t just bloom—they glow. Mustard and poppies spill across the hillsides, lupine and verbena add their accents, and the Pacific keeps up a steady drumbeat below. It’s one of those rare places that feels both wild and welcoming, and I’ll say it plainly: this park ranks among my all-time top five of California’s 270 state parks. Every July 19, I celebrate my birthday the best way I know how—with a long hike here, the ocean at my side and the wind in my face.
A few miles down the coast, the story takes a curious turn.
At Point Buchon, the same wildflowers and wave-carved cliffs lead you through a landscape that feels untouched—until, around a bend, you find yourself looking at the Diablo Canyon Nuclear Power Plant. Nature and megawatts, side by side. Only in California.
Full disclosure: in my younger, more combustible days, I was arrested for protesting that very plant. So I half expected to be turned away at the trailhead—“Sorry, Trailmaster, you’re on the blacklist.” Apparently not.
Good news for all of us.
Because these two coastal walks—one a beloved classic, the other a semi-secret—remind us that California’s edge is never just scenic.
It’s storied.
Montaña de Oro State Park
Montaña de Oro means “mountain of gold,” and you don’t need a Spanish-English dictionary to figure out why. In springtime the coastal bluffs glow with golden mustard and poppies, accented by purple lupine, pink sand verbena, and the occasional bright orange nasturtium gone feral. But the name also speaks to the gold standard of hiking along the Central Coast.
This park has everything a hiker dreams of: rugged bluffs, hidden coves, tidepools that could occupy a curious naturalist for hours, even inland trails climbing to peaks and ridges with far-reaching ocean views. Valencia Peak rises 1,347 feet and rewards the stout of heart with a sweeping panorama of Morro Rock, the Morro Bay estuary, and the long blue line of the Pacific. Coon Creek shelters a rare grove of Bishop pines, a southern outpost for this otherwise northern species.
But the signature hike—the one you’ll tell your friends about, the one you’ll tuck away in your memory as one of the great coastal strolls in all California—is Bluff Trail. It’s nearly flat, accessible, and delivers nonstop drama: crashing surf, sculpted sea caves, blowholes, and pocket beaches tucked against the base of golden cliffs.
Montaña de Oro’s story is also human. Much of the park was once Spooner Ranch, where Alexander and Arvin Spooner ran cattle, grew crops, and later rented cabins to tourists. Their old ranch house serves today as the visitor center. Before that, smugglers found Spooner’s Cove a handy place to land contraband, from aguardiente in Spanish colonial days to whiskey during Prohibition. Today it’s family picnics and tidepool explorations that fill the cove—though the wild winds remind you this coast still belongs more to the elements than to us.
And the wildlife! Harbor seals nap on offshore rocks. Sea otters roll in the kelp beds, cracking shellfish on their bellies with polished stones. Offshore, pelicans glide in squadrons, cormorants dive in unison, and the sharp-eyed hiker might even spot black oyster catchers tap-dancing across tide-slick rocks with their neon bills flashing like traffic cones.
This park is both wild and welcoming, a rare combination that explains why so many Californians, myself included, count it among their absolute favorites. If every trail tells a story, Bluff Trail (a 4.2-mile jaunt) tells one of timeless beauty and the endless meeting of land and sea.
Panoramic vistas from Point Buchon include drop-dead gorgeous headlands, wildflower-strewn bluffs, sea stacks, sea caves and…Diablo Canyon Nuclear Power Plant.
Yes, you read that right. One of California’s most pristine coastal walks is in close proximity to a nuclear facility. Only on the Central Coast do you get this particular pairing: pelicans gliding past sandstone cliffs while, just down the shoreline, engineers monitor reactors designed to keep the lights on from San Luis Obispo to Silicon Valley. Nature and megawatts, side by side.
This rare opportunity to hike PG&E-owned Diablo Canyon lands reveals a portion of 14 miles of coastline that have remained remarkably untouched. No subdivisions, no marinas—just wind, waves, and a landscape that looks much as it did centuries ago. Inland, coastal prairie rolls into oak woodland and pockets of bishop pine, a reminder that this is a meeting place of ecosystems as well as tectonic plates.
The point itself takes its name—somewhat contentiously—from a Chumash leader. Spanish explorers, never shy about creative interpretation, rendered the name “Buchon,” possibly referencing a “goiter” or possibly just getting it wrong. Either way, the land long predates the name, and Chumash presence lingers in the quiet dignity of the place.
Brown pelicans skim the surf in tight formation. Harbor seals and sea otters bob in the kelp beds below. In migration season, gray whales pass just offshore, their blows visible from the bluffs. Red-tailed hawks and kestrels patrol overhead, riding the same coastal winds that may, along this trail, test your balance and your hat.
The trail itself feels like a cousin to Montaña de Oro’s Bluff Trail—same drama, fewer people, more sense that you’ve stumbled into something semi-secret. That’s partly by design. Access is limited (Thursday–Monday, reservations required at the trailhead), and the daily cap keeps things blissfully uncrowded.
And yes, you’ll sign a waiver before heading out. Cliffs, surf, uneven terrain—fair enough. Nuclear meltdown not included. Probably.
Minimal elevation gain makes this an approachable adventure, but don’t mistake “easy” for ordinary. This is the kind of hike where you stop often, not because you’re tired, but because the coastline keeps insisting you look again. Read the full trail guide for this 6.6-mile round trip hike.
The northern coast of Montaña de Oro State Park has been described as a “gigantic sand pile.” Park your car at the Sandspit Beach lot. From there, you can head down a hill to the beach between tall sand dunes. Play in the dunes or hike for 4+ miles north toward Morro Rock along the Morro Bay Sandspit, the long finger of sand that separates the ocean from Morro Bay Estuary.
On the drive to the trailhead, I love to stop at Carlock’s Bakery, located at 1024 Los Osos Valley Road in Los Osos. Friendly and family-run, it offers a large variety of daily-baked goods at fair prices: pastries, breads, donuts, and croissants.
Hike On, John McKinney The Trailmaster
“Every trail tells a story.”
From the Trailmaster Library
If you’d like to explore more California trails:
Other regions have tall mountains, forests, deserts and an awesome coastline, but only Southern California has all of them – and four-season hiking! You’re guaranteed to find a hike (many hikes!) you’ll like in this “greatest hits” collection. Every Trail Tells a Story. Hike On!
I’ve made a career out of telling people to take a hike.
Not in the way you’re thinking—though I’ve probably meant it that way once or twice—but as an invitation. An invitation to get outside, to walk a little farther, to see what’s just around the bend.
For years, I’ve told those stories in books, in newspapers, and on trails all across California. But the truth is, I’ve always felt that hiking is about more than where you go.
It’s about what you notice. What you remember. What stays with you long after the trail ends.
That’s why I’m starting this newsletter.
Each week, I’ll share a favorite California hike—not just where to go, but the story behind the place. The history, the characters, the small details that turn a walk into something more.
Think of it as part trail guide, part campfire story.
If you love California—the coast, the mountains, the deserts, the state parks and national parks—you’re in the right place.
I’ve spent a lifetime walking these trails.
Now I get to share them with you.
Every Trail Tells a Story
This short video says it better than I ever could in print.
It’s the idea that’s guided every mile I’ve walked and every story I’ve told.
• Trails across California—coast, mountains, deserts, and forests • The people, history, and small details most hikers miss • A weekly reason to step outside
Because a trail isn’t just a line on a map.
It’s an experience waiting to happen.
California State Parks — 280 of ‘em. Who knew?
I’ll admit it—I’m a bit obsessed with California State Parks.
Over the years, I’ve hiked and written about all 280 of them. And here’s something most people don’t realize: more than half are true “hiker parks,” with over 3,000 miles of trail threading through redwoods, deserts, coastlines, and mountain ranges.
A few are famous.
Many are not.
Those are the ones I especially love to share.
California’s National Parks — Icons and Beyond
California has more national parks than any state in the country—nine in all.
You’ll find the giants here: Yosemite, Sequoia, Joshua Tree.
But you’ll also find quieter corners—places like Point Reyes, Lava Beds, and Mojave—where the crowds thin out and the stories deepen.
I’ll take you to both.
A Final Thought
If you stick with me, you won’t just find new places to hike.
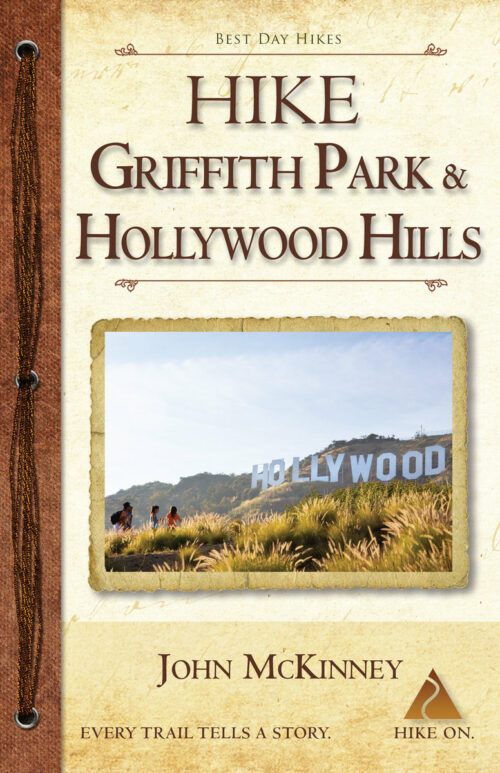
Hike to the HOLLYWOOD Sign. Celebrate the 100th anniversary of the iconic landmark. Enjoy this fun new video HIKE TO THE HOLLYWOOD SIGN
When the HOLLYWOOD Sign was dedicated on July 13, 1923, no one imagined it would become an iconic symbol for the entertainment industry and greater Los Angeles. Four thousand blinking bulbs were added to the towering letters, and it was lit up for the first time December 8, 1923
A hundred years ago, it was the HOLLYWOODLAND sign, put up by real estate developers to promote the sales of new homes in the Hollywood Hills. At the time, the “sign was believed to be the largest in the world.
Given the Writer Guild and Screen Actors Guild strikes and the uncertainty facing the TV-film industry, little wonder the sign has received scant attention in its centennial year. For a longer explanation of why the HOLLYWOOD Sign’s big year has been a bust, check out the Washington Post HOLLYWOOD Sign Story
Nevertheless it continues to be a highly popular destination for hikers. So let’s learn a little more about the Hollywood Sign before we hit the trail.
In the 1920s, visitors drove not hiked to the HOLLYWOODLAND Sign as it was then known.
A rather rickety real estate advertisement it was, 14 unevenly spaced, 50-foot-high letters that swayed in the breeze. It was built to last for a year or two, but Hollywood rapidly became the moviemaking capital of the world and the sign endured, now forever associated with the silver scree
Hiking to the HOLLYWOOD Sign likely began in earnest during the 1930s when Depression era government workers constructed the Griffith Park trail system. In 1944, about 440 acres surrounding the HOLLYWOODLAND sign became part of Griffith Park. When the sign finally got a little TLC in 1949, the “LAND” portion of the sign was removed.
In 1978 the sign got an extreme makeover with steel letters supported by sturdy cement columns thanks to the generosity of celeb donors, including Hugh Hefner, Alice Cooper, and Gene Autry. Visit the Hollywood Sign Trust to learn more about the history of the HOLLYWOOD Sign.
Mt. Lee NOT Mt. Hollywood is where you’ll find the HOLLYWOOD Sign
First thing a hiker needs to know is that Mt. Hollywood, Griffith Park’s premiere peak, is NOT the mountain crowned by the HOLLYWOOD Sign. The HOLLYWOOD SIGN rests near the summit of Mt. Lee. You’ll get great photo angles on the sign and abundant selfie opportunities as you ascend Mt. Lee. (Resist the urge to climb over the fence in order to have your picture taken next to the sign; it’s strictly illegal.
The Hollywood Hills form the eastern end of the Santa Monica Mountains and share a similar ecology to the range’s taller and wilder peaks to the west. The differences between the two ends of the range have more to do with human settlement than natural history; the Hollywood Hills are by far the most developed part of the mountains.
Three of The Trailmaster’s Favorite Hikes
Hike to the HOLLYWOOD Sign from Innsdale Drive: Easy hike to Hollywood Sign Overlook (Selfie Heaven), followed by ascent on Mulholland Trail and Mt. Lee Drive to the sign.
Hike to the HOLLYWOOD Sign from Wonderview Drive: A somewhat challenging route for the true hiker! Visit the Wisdom Tree and ascend Burbank Peak and Cahuenga Peak via Aileen Getty Trail on the way to the sign.
Hike to the HOLLYWOOD Sign from Brush Canyon: Visit the Bronson Caves (“Bat Cave”), ascend Brush Canyon to Mulholland Trail, then over to Mt. Lee Drive to the sign.
You can also hike to the HOLLYWOOD Sign from several popular locales in Griffith Park including Ferndell, Griffith Observatory, and Mt. Hollywood. Trailmaster recommendation: Climbing to Mt. Hollywood AND to the HOLLYWOOD Sign on the slopes of Mt. Lee adds up to a great hike!
Hollywood Sign from Innsdale Drive
From Innsdale Drive to Hollywood Sign Viewpoint
is 2 miles round trip with 200-foot elevation gain; to HOLLYWOOD Sign is 4.6 miles round trip with 700- foot gain
This hike does not save the best for last. Great views of the HOLLYWOOD Sign are yours from the beginning of the hike, which makes it highly appealing to the many visitors from across the nation and around the world looking for the easiest way to get photo ops.
A combination of winding streets and dirt fire roads lead a short mile to Hollywood Sign Viewpoint, aka Selfie Heaven. Frame your photos with the flora en route: cactus, California holly, palm trees, bougainvillea, and bamboo.
DIRECTIONS: From northbound Highway 101, exit on Barham Drive and drive north 0.3 mile to Lake Hollywood Drive. Turn right and follow the winding road, passing a junction with Wonder View Drive, then Lake Hollywood Reservoir. After 1.5 miles, turn left on Tahoe Drive and continue 0.25 mile to Canyon Lake Drive. Find curbside parking where you can, and the trailhead located 0.1 mile at the end of Canyon Lake Drive at Innsdale Drive.
THE HIKE: Walk up the wide dirt road (Innsdale Trail for lack of a better name) and… wow, there it is, the HOLLYWOOD Sign. Curve around a bend and just 0.25-mile out, you’ll find yourself directly below the letters. Wow!
The fire road angles right toward houses and at the 0.5-mile mark, squeeze past a driveway and reach a residential street (Mulholland). Turn left and make another left at the first junction. March past a thicket of signs, ascend past a last house to reach a dirt road, and wind across a hillside above the HollywoodLand neighborhood.
A short mile from the trailhead, the dirt trail ends at a teal-colored gate. Ascend steps to a paved road located at the crest of Deronda Drive to meet Mt. Lee Drive and a junction. Walk 100 yards up the paved service road (toward a water tank) to Hollywood Sign View. Join visitors from around the world, nearly all taking and posting photos.
Back to business and the route to the Hollywood Sign: 1.3 more miles up paved Mt. Leet Drive. As you ascend get views of Griffith Observatory and Mt. Hollywood to the east, and downtown L.A. to the southeast and, in 0.3 mile, meet a dirt fire road (Mulholland Trail) that leads toward Brush Canyon (see hike description). Keep left on the paved road for the final mile, and get more views: the Verdugo Mountains, San Gabriel Mountains, and downtown Burbank.
Just short of the summit, look right and note the signed junction with steep Aileen Getty Ridge Trail that leads to Cahuenga Peak. (A great add-on to this hike!) Minutes later, pass along the chain link fence separating the road from the sign, and reach a vista point above the ‘H’ in the HOLLYWOOD Sign. Enjoy!
Hollywood Sign from Wonderview Drive
From Wonder View Drive to Cahuenga Peak is 2.4 miles round trip with 900-foot elevation gain; to Mt Lee is 3.2 miles round trip
Wonder View Trail leads to the 1,820-foot summit of Cahuenga Peak, high point of the Hollywood Hills. The narrow and steep path (a true hiker’s route) continues to nearby Mt. Lee, which hosts the famed HOLLYWOOD Sign.
In 2010, hikers and movie fans from across the nation and around the world were delighted to learn that creative conservation efforts, combined with fundraising from private and public sectors, succeeded in purchasing the peak and adding it to Griffith Park.
When the developers announced plans to subdivide the peak into luxury estates, local conservationists, film fans, and celebs rallied to “Save the Peak.” Some
$12 million was raised to purchase the 138-acre site. Hollywood notables, including Steven Spielberg and Tom Hanks, plus the Tiffany & Company Foundation, Hugh Hefner and Aileen Getty contributed serious cash, as did state and local agencies.
Enjoy vistas from Burbank Peak and Cahuenga Peak on the way to Mt. Lee and the HOLLYWOOD Sign.
As the story goes, Cahuenga, which names a pass, a peak and nowadays a boulevard was once a native Shoshone village located on the banks of the Los Angeles River near present-day Universal City. The peak is the 12th highest in the Hollywood Hills/Santa Monica Mountains.
DIRECTIONS: From Highway 101 in North Hollywood, exit on Barham Boulevard and head north 0.3 mile. Turn right on Lake Hollywood Drive and continue 0.5 mile to intersect Wonder View Drive (no street parking). Park alongside Lake Hollywood Drive.
THE HIKE: Walk 0.25 mile up paved Wonder View Drive to its end. Hike past a yellow vehicle gate on dirt road 300 feet to unsigned Burbank Peak Trail (formerly Wonder View Trail) on your right. Begin a steep eastward ascent east, zigzagging up the south slope of Cahuenga Peak. Enjoy wonderful views of Mt. Lee with its forest of antennae, Griffith Observatory, Mt. Hollywood, downtown L.A.
Step off the trail and get wisdom or share it at the Wisdom Tree
After a quite aggressive 0.8-mile climb the rough trail gains a ridgeline and splits: the signed right fork leads to Cahuenga Peak and a short pathway leads left to a lone pine tree and the top of Burbank Peak (1,690 feet). Pause to read the summit logbook stashed below the Wisdom Tree; hikers have been known to get very creative with their philosophizing in this book. Clear-day panoramic views are terrific—particularly angles on the San Fernando Valley and San Gabriel Mountains.
Join signed Aileen Getty Ridge Trail and hike east along a ridgeline 0.3 mile to the summit of Cahuenga Peak. The path then drops to a saddle between Cahuenga Peak and Mt. Lee (1,680 feet) and ends at Mount Lee Road. Turn right and walk up the paved road to the viewpoint above the HOLLYWOOD Sign.
Hollywood Sign from Brush Canyon
From Canyon Drive to HOLLYWOOD Sign is 6.4 miles round trip with 1,100-foot elevation gain
Located in the southeast area of the Griffith Park, Brush Canyon is less developed and less crowded than other areas of the park. Cloaked in chaparral, Brush Canyon definitely lives up to its name. Apparently, its brushy nature was not a secret; “Brush Canyon” was on the map in the early years of the 20th century—even before the park was established.
But brush isn’t the only flora in the Brush Canyon. Oak and sycamore thrive in the bottom of the canyon.
Along with offering a convenient trailhead for a hike to the HOLLYWOOD Sign, Brush Canyon is an ideal place to start for a sojourn to other nearby summits—particularly the three noteworthy peaks that rise above the ridges of the canyon: Mt. Bell, Mt. Chapel and Mt. Hollywood.
Due to the closure of the Hollyridge Trail, Canyon Drive trailhead has become a favorite trailhead for a hike to the HOLLYWOOD Sign. Expect lots of company on the trail from SoCal hikers and visitors from across the US and around the world.
Enjoy the view from above the DOOWYLLOH Sign, uh, HOLLYWOOD Sign
DIRECTIONS: From Franklin Avenue, on the southern boundary of Griffith Park, turn north on Bronson Avenue or Canyon Drive (the streets soon join and continue as Canyon). Follow Canyon Drive a winding mile through the hills into Griffith Park. Park alongside the road or in a lot near a picnic area or in a small parking lot by the trailhead at road’s end. Note: Park authorities close the road at sunset.
THE HIKE: Those heading directly for the Bronson Caves will locate the trailhead on the right (east) side of Canyon Drive. Join a fire road and hike south a short distance to the caves.
Walk past an info board with a large park map and join the fire road (Brush Canyon Trail). The trail passes handsome sycamores that line the canyon bottom but once the trail begins climbing northeast it leaves the trees behind and Brush Canyon lives up to its name. Chaparral flora frame views of the HOLLYWOOD Sign and Mt. Hollywood.
After 1.25 miles and a stiff 600-foot gain, reach an overlook (great views of metro LA) and soon thereafter a signed junction with Mulholland Trail, a wide dirt road. Go left (west) on a more level course, pass a junction with Hollyridge Trail (that leads to the closed Beachwood Drive trailhead). Keep right, and wind west to meet Mt. Lee Drive, 2.2 miles from the trailhead.
A 0.4-mile descent on Mt. Lee Drive leads to Hollywood Sign View (great views indeed and photo ops galore from this overlook; see hike description from Innsdale Drive). Ascend the steep paved road about 1 mile to the summit and a view of DOOWYLLOH, those giant white capital letters from above and behind the sign.
A locked gate prevents hikers from reaching the top of Mt. Lee. But do enjoy the views from about 100 feet above the HOLLYWOOD Sign.
California State Parks offer some of the best hiking the state has to offer: Torrey Pines, Malibu Creek, Point Lobos, Calaveras Big Trees, Humboldt Redwoods and a hundred more. Watch my video Hike California State Parks and hiker on!
With the recent addition of Dos Rios Ranch State Park to the system, California now has 280 state parks!
Who knew?
The short answer is hardly anyone. I’ve asked a thousand Californians or more to name five California State Parks. Fewer than 10 percent can do so. Surprising to me, a majority of these baffled respondents are outdoorsy Californians—the kind of people who come to my talks or I meet on the trail.
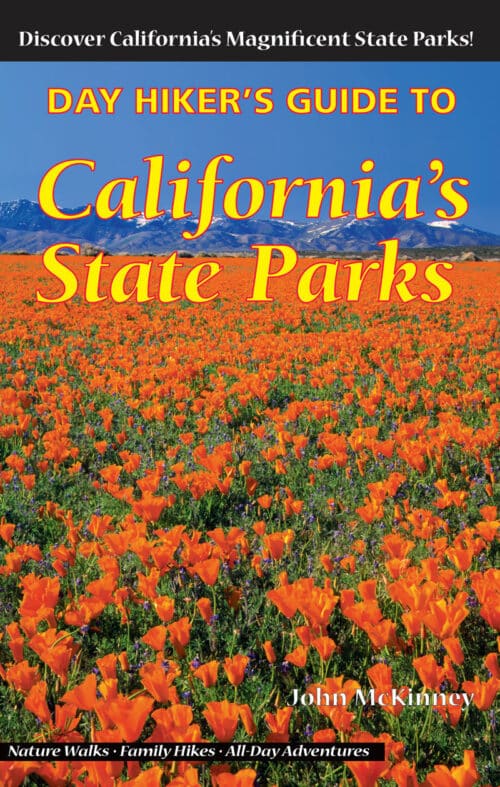
I confess to being a little obsessed by California state parks and am the only crazy enough to have hiked and written about all 280 of them. At first my interest in the parks was professional. During a long stint as the Los Angeles Times hiking columnist, I noticed my readers enjoyed discovering SoCal’s state parklands. For nearly 20 years, I partnered with the California State Parks Foundation, helping to share stories about the wonders of our state parks. Then I started keeping a list of parks I visited, and you know how it is when you get compulsive about something…
Turns out you can take a hike in about half of California’s 280 state parks. You can explore these “hiker parks” on 3,000(!) miles of trail.
The California State Park System is widely regarded as the nation’s finest—and the most popular, too, with nearly 70 million visitors a year. In terms of number of parks and number of visitors, it’s second only to the National Parks system.
Other states have high mountains, vast deserts, and scenic shorelines, but only California contains all of these natural features, and preserves examples of them in its park system.
The multitude of intriguing state park environments, and the many fine paths that explore them, add up to some world-class hiking adventures.
Ancient redwoods grow along the mist-covered edge of the continent. The alpine beauty of the Sierra Nevada towers above Emerald Bay and Sugar Pine Point state parks on the shores of world-famous Lake Tahoe. Warm, sandy state beaches from San Clemente to Refugio beckon visitors to Southern California.
State parks preserve a cross-section of California ecology from the bottom of the Central Valley at Caswell Memorial State Park to the top of alpine peaks at Mt. San Jacinto State Park; from uncommonly dry desert lands, where Joshua trees thrive, such as Saddleback Butte State Park to the near-rainforest environment of Del Norte Redwoods State Park.
State parks showcase a fabulous array of Nature’s handiwork: giant Sequoias in Calaveras Big Trees State Park; the rare Torrey pines making a last stand in a natural reserve near San Diego; palm oases in Anza-Borrego Desert State Park; some of the tallest trees on earth in Jedediah Smith Redwoods State Park.
State parks highlight California’s history and offer the opportunity to follow the trails of the forty-niners, Spanish missionaries, and Native Americans. Hike into history where the Gold Rush began (Marshall Gold State Historic Park), where a famed writer found inspiration (Jack London State Historic Park), where a lonely lighthouse-keeper lived and worked (Pt. Sur State Historic Park).
Park pathways are as varied as the parks themselves. Some trails are easy—a “walk in the park.” Leg-stretchers along the Sacramento River at Woodson Bridge and Colusa state recreation areas allow motorists a break from Interstate 5; beach walks from Border Field State Park to MacKerricher State Beach provide a similar break from Coast Highway 1.
Many state park hikes are suitable for the whole family—slow paced adventures with much to see on a short hike. These family hikes, by utilizing described options, can usually be extended to half- day or all-day outings. The avid hiker will find challenges aplenty in the parks, too—long day hikes that offer grand tours and great workouts.
Hike smart, reconnect with nature, and have a wonderful time on the trail.
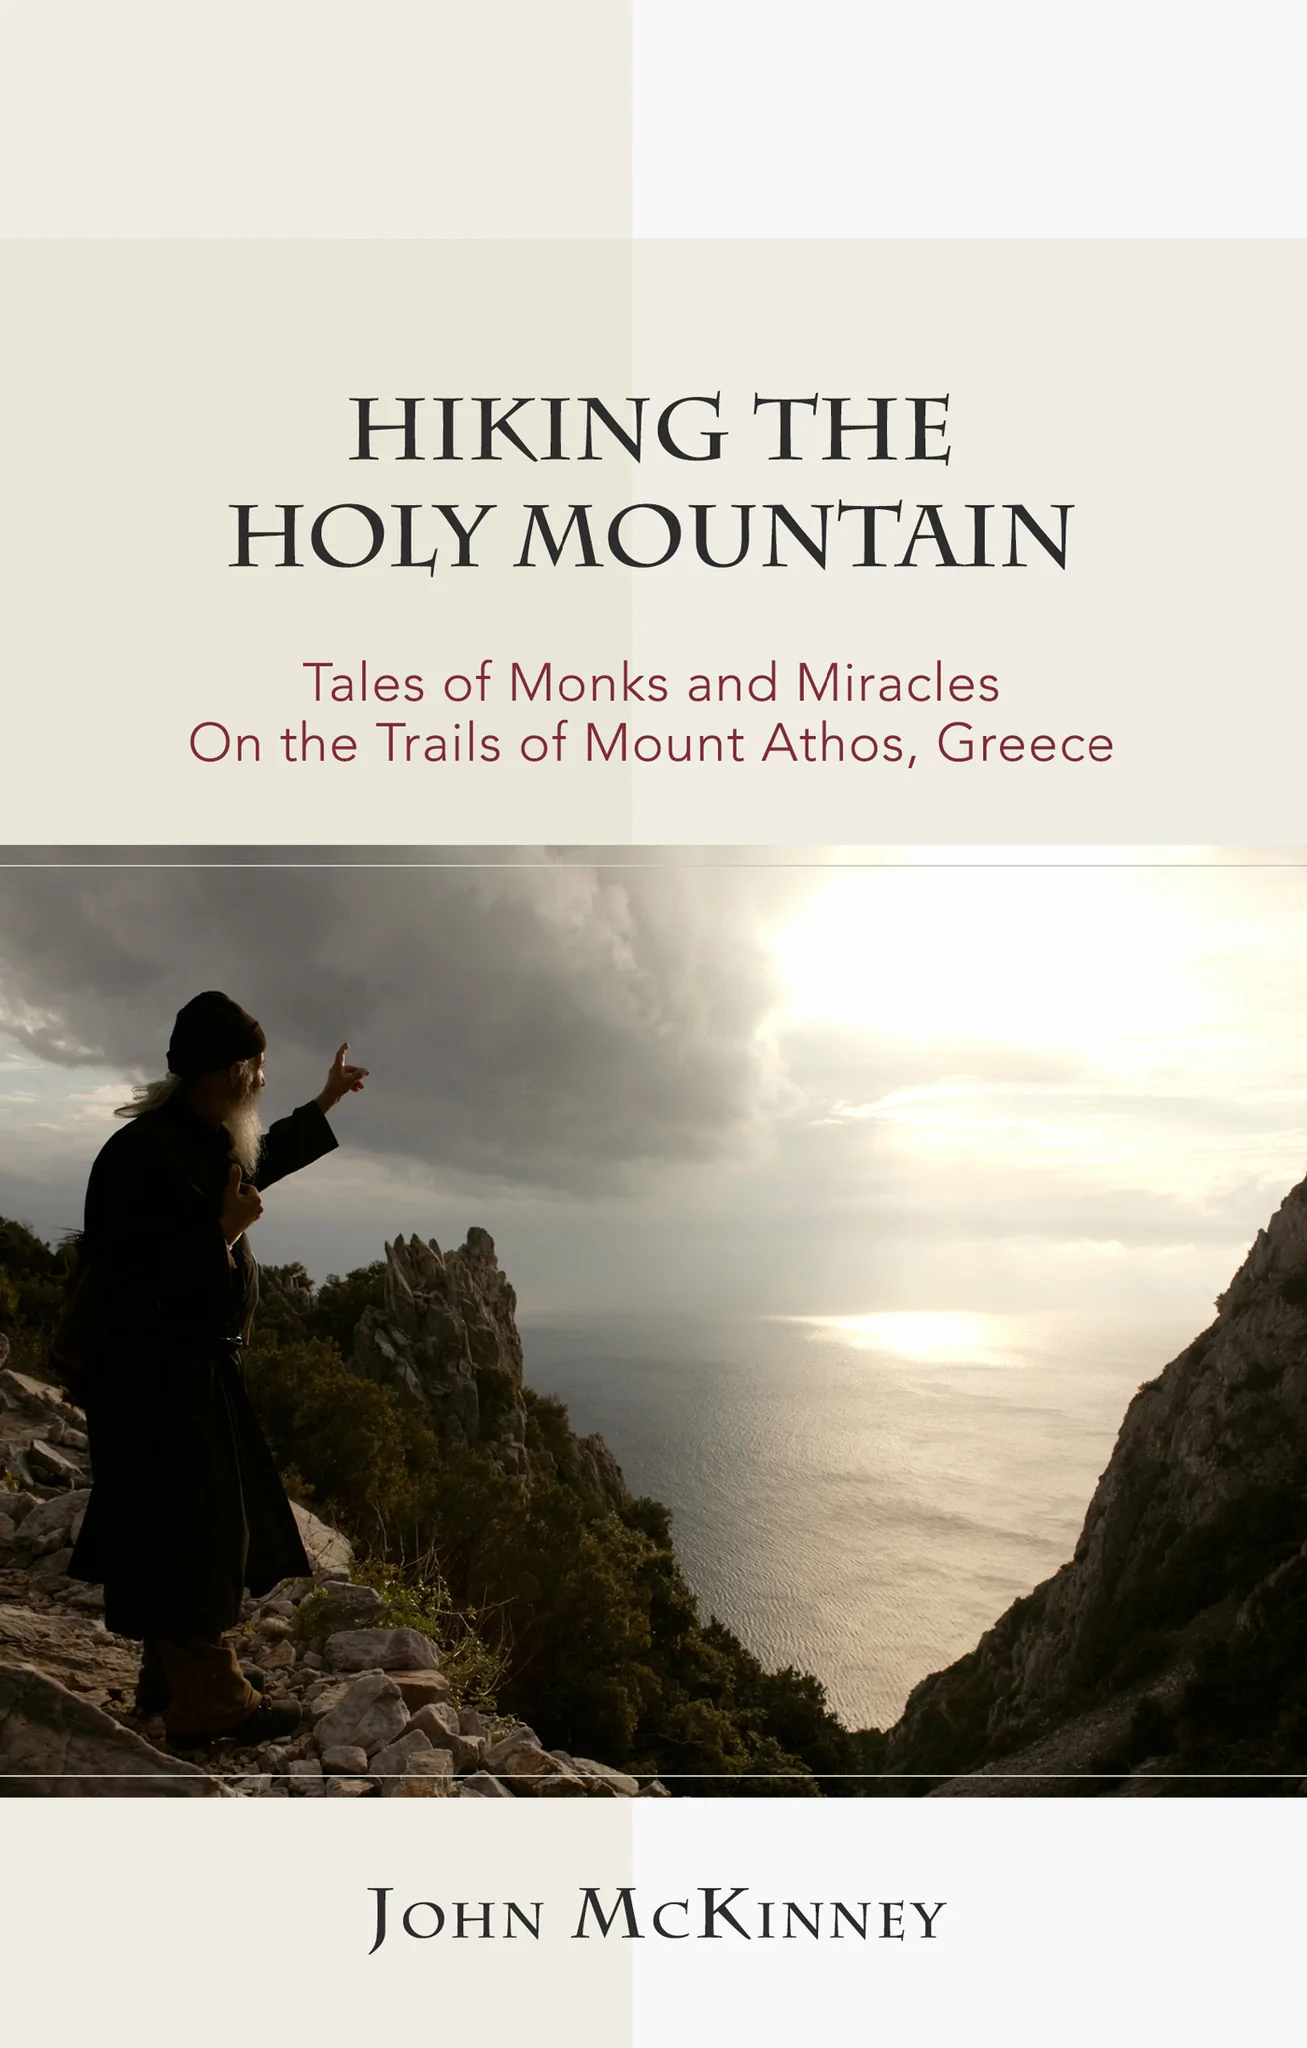
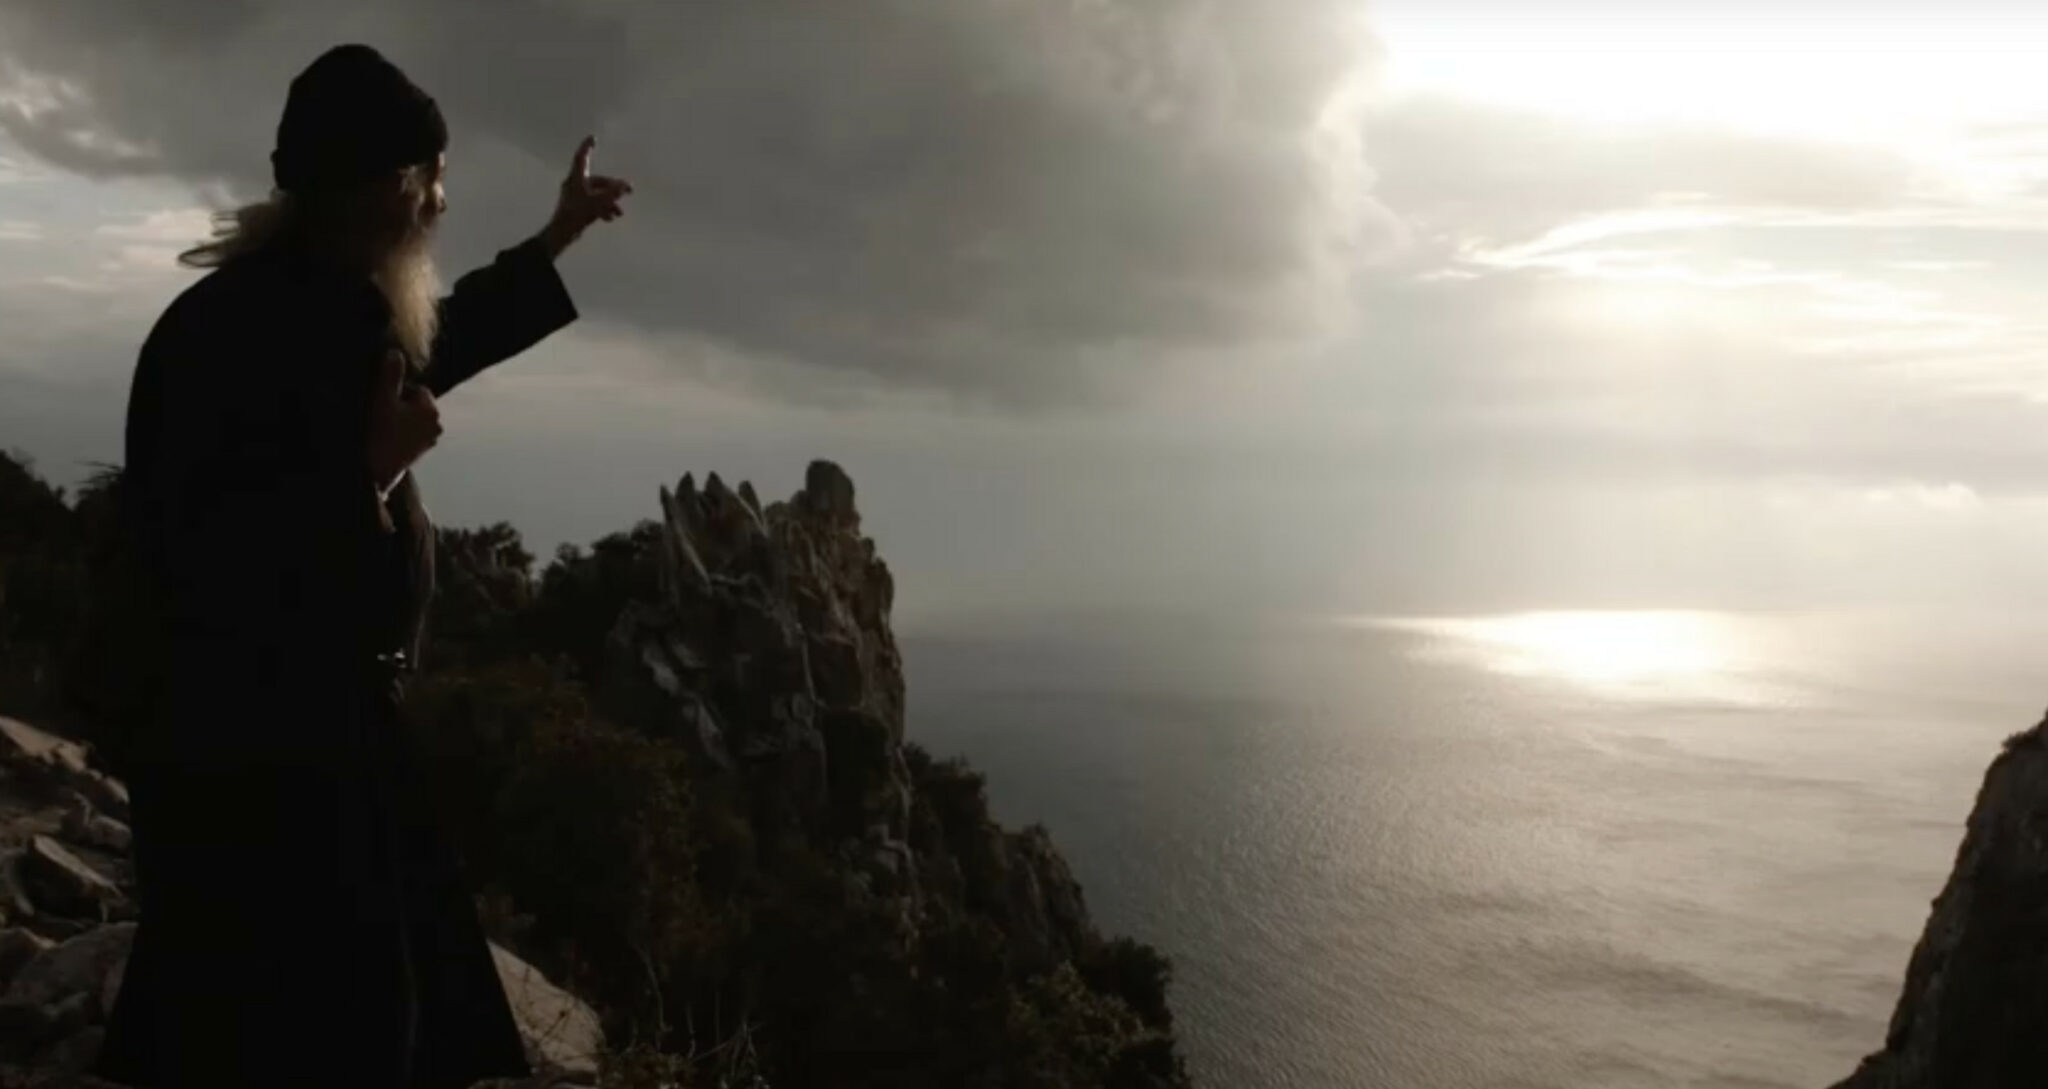
While the ‘plot’ and colorful cast of Greek monks in “Hiking the Holy Mountain” seem like they came from a movie script, this is very much a true story!
Hiking the Holy Mountain: Tales of Monks and Miracles on the Trails of Mount Athos, Greece
“Hiking the Holy Mountain: Tales of Monks and Miracles on the Trails of Mount Athos, Greece” is the story of a hike like no other, encounters with a Greek monk/ iconographer named Father Daniel, amazing trips back in time and in faith to Mt. Athos, and miraculous events that occurred on—and off—the Holy Mountain. Mixed in are vivid tales from the lives of saints: St. Barbara imprisoned in a tower by her pagan father, dog-faced St. Christopher, the heroics of St. Constantine.
How do you tell a story like this in two minutes?
Well you don’t. But we figured that if a movie we really like that tells the story of a spiritual hike, “The Way,” could hook viewers in 2:32, we could too.
We wanted to make three points in the Hiking the Holy Mountain Book Trailer:
Want to make God laugh? Tell Him your plans. A well-worn joke to be sure, but oh-so-true. My plan was to write a magazine story about this strange place to hike. Well, that was my plan…
On this amazing path we call life, we’re often compelled to change direction. I told the monks I was only hiking to Saint Anna’s to pick up the trail to the top of the mountain. How come they didn’t believe me and started asking me all these personal questions about my family?
On the trail between earth and heaven, anything is possible. We never hike alone.
Credits: Efharisto (that’s ‘thank you’ in Greek) to George Mamalakis, editor and music; Greg Pantages, narrator; Spiro Deligiannis and Zachary Deligiannis for photos and video clips.
"Hike with Kids will encourage countless families and children to explore the great outdoors.” —Richard Louv, Last Child in the Woods HIKE With Kids is now Available!
“It’s a gift from one generation to another to take kids on a hike,” says John McKinney author of 30 hiking-themed books whose weekly hiking column ran for 18 years in the Los Angeles Times. “As a parent myself, I wrote HIKE With Kids to inspire adults to take kids hiking and to provide the practicalities to do so.”
(For hikers in many parts of the country, it’s not advisable to take a hike right now while the country is battling the Covid-19 pandemic, McKinney cautions. In some regions, it might be okay to hike, provided social distancing practices are observed and the trail is wide and lightly traveled.)
Whether you’re indoors a lot or not, it’s a good time to learn about nature, nurture, and the fun you and your kids will have on a hike.
Hike with Kids Is the Antidote We Need
Recent studies have shown that more American children are replacing outdoor activities with those done indoors and, as a consequence, are suffering from what author-advocate Richard Louv calls “Nature Deficit Disorder.” But according to McKinney there is an antidote. Taking a hike in nature improves the health of children, increases their ability to concentrate and boosts their self-esteem, emotional wellbeing and leadership skills.
From selecting gear to safety tips to favorite trail snacks, John reveals the best ways to share the joys of nature—and the fun of hiking with kids.
Discover which of the Ten Essentials are truly essential and the Six Secrets to Hiking with kids.
Gear-up with the right stuff, learn what to pack, and how to pick a hike kids will like.
Get tips for hiking with kids of all ages: babies and toddlers, tweens and teens.
And be sure to check out “The Trailmaster’s Ten-Point Plan for Getting Kids Back on the Nature Trail.”
“Beyond the substantial physical and emotional benefits found through hiking, kids who hike learn an appreciation for nature that lasts a lifetime,” say McKinney. “They’re the ones who will stand up and protect our natural environments in the future. Hiking is an investment in them and in our future.”
More than 30 different kinds of hiking trails offer us a chance to take a hike! Who knew?
I know I first picture and define hiking trails as narrow dirt footpaths, and I suspect a lot of other hikers think about hiking trails that way too. But on further reflection, we start making distinctions: hiking trail, biking trail, connector trail and loop trail, and so on.
Trail, Access Any trail that connects the main trail to a town, road, or another trail or trail system.
Trail, Backcountry A primitive trail in an area where there are no maintained roads or permanent buildings.
Trail, Connecting or Side Trails providing additional points of access to national recreation, scenic, or historic trails per the National Trails System Act.
Trail, Designated Specific trails identified by the land management agency where some type of use (motorized or non-motorized) is appropriate and allowed either seasonally or yearlong and which have been inventoried and mapped and are appropriately signed on the ground.
Trail, Destination A trail that connects two distinct points (A to B) rather than returning the user to the original beginning point.
Trail, Directional Use (One-way) A trail laid out in such a way as to encourage users to travel in one direction.
Trail, Double-track A trail that allows for two users to travel side by side, or to pass without one user having to yield the trail. Double-track trails are often old forest or fire roads.
Trail, Extended Trails more than 100 miles in length (as defined in the National Trails System Act).
Trail, Feeder A trail designed to connect local facilities, neighborhoods, campgrounds, etc. to a main trail.
Trail, Front country Less emphasis is put on minimizing contact with signs of the civilized world. The main objective is to provide enjoyable trail experiences within the vicinity of developed areas by utilizing the scenic and interpretative features of semi-urban, rural, and natural environments.
Trail, Greenway (Urban Trail) A trail established along a natural corridor, such as a river, stream ridgeline, rail trail, canal, or other route for conservation, recreation, or alternative transportation purposes. Greenway Trails can connect parks, nature preserves, cultural facilities, and historic sites with business and residential areas.
Trail, Hiker-Biker An urban paved trail designed for use by pedestrians and bicyclists.
Trail, Hiking Moderate to long distance trail with the primary function of providing long-distance walking experiences (usually two miles or more).
Trail, Interpretive (Nature Trail) Short to moderate length trail (1/2 to 1 mile) with primary function of providing an opportunity to walk or paddle and study interesting or unusual plants or natural features at user’s pleasure. The ideal nature trail has a story to tell. It unifies the various features or elements along the trail into a related theme.
Trail, Long Distance In general a trail best characterized by length (more than 50 miles), linearity (follows a linear feature), and diversity (geo- graphic and political).
Trail, Loop(ed) Trail or trail systems designed so that the routes are closed circuits connecting a number of points of interest, giving users the option of not traveling the same section of trail more than once on a trip.
Trail, Multiple-Use (Multi-Use, Diversified Use, Shared Use) A trail that permits more than on user group at a time (equestrian, hiker, mountain bicyclist, etc.).
Trail, Out-and-Back A one-way trail on which you travel to a destination then backtrack to the trailhead.
Trail, Pack A trail used by recreational stock; usually extended trails used by pack stings for overnight trips.
Trail, Primary Continuous through route that originates at a trailhead. Primarily for directing users through an area while promoting a certain type of experience.
Trail, Recreation A trail that is designed to provide a recreational experience.
Trail, Regional An extended or longer trail that may cross one or more land management agency jurisdictions and connects diverse trail systems.
Trail, Secondary Short trail used to connect primary trails or branches of primary trails. They encourage movement between two primary trails or facilitate dispersal of use through secondary branching.
Trail, Side Dead-end trail that accesses features near the main trail.
Trail, Single-Track A trail so narrow that users must generally travel in a single file.
Trail, Single-Use One that is designed and constructed for only one intended use (i.e. hiking only).
Trail, Spur A trail that leads from primary, secondary, or spine trails to points of user interests such as overlooks, campsites, etc.
Trail, Stacked Loop Trail or trail systems designed with many loops “stacked” on each other, giving users the option of not traveling the same section of trail more than once on a trip.
Trail, Stock A route/trail used by commercial stock.
Trail, Undesignated (Social, Wildcat, Way, Informal, User or Visitor Created) Any unofficial trails that develop informally from use and are not designated or maintained by an agency; often found cutting switchbacks or between adjacent trails, campsites, or other sites of interest. Undesignated trails can be dangerous, eroded, and unsustainable.
Interested in gear that shows off your hiking know-how? Check it out HERE.
Spring is the exact same length as other seasons. But wherever you live, and wherever you hike, spring is the one season that everyone agrees is too short. Just when you notice the days are longer and the flowers are in bloom, it’s summer.
April showers bring May flowers.
True enough at very particular latitudes and altitudes. In the low desert, however, for example, January showers bring February flowers. And in the Rockies, June showers can bring July flowers.
If an advertiser claimed, “April showers bring May flowers,” the government would require a lengthy disclaimer.
Wildflowers bloom at greatly different times and elevations in Sequoia National Park. (NPS)
I’m indebted to rangers at the Sequoia National Park Visitor Center for pointing out to me that certain parts of the country—most particularly the regions around Sequoia, Kings Canyon and Yosemite national parks—have nine months of spring: January through September. These parks offer a way of resolving the “National Spring Deficit,” the rangers joke.
More accurately, Sequoia National Park has 13,000 feet of spring, interpretive rangers explain. Elevations in this park range from just over 1,000 feet to the 14,494-foot top of Mt. Whitney. For every 1,000 foot increase in elevation, there is a corresponding temperature drop of three degrees F.
So what does a change of elevation really mean? And how does it get us more spring?
In Sequoia National Park, and in other fabulous hiking areas around North America, if you’re willing to gain elevation, you can partake of the joys of spring hiking for far longer than the traditionally defined three month period between the vernal equinox and the summer solstice. In certain mountain ranges, a wide range of temperatures and elevations create a variety of habitats and climates, both macro and micro, that can make hiking in spring a 9-month opportunity.
Spanish broom: one of many blooms in Sequoia National Park’s lengthy Spring. (NPS)
In the case of the High Sierra, the first flowering plants can appear as early as January in the lowest foothills that rise from California’s flat Central Valley. At Sequoia National Park’s middle elevations (4,000 to 7,000 feet), where the mighty sequoias thrive, spring flowers begin to bedeck the meadows in April. On higher slopes, hikers will notice the more obvious signs of spring—tender grasses and wildflowers—in June and July. In the very highest alpine ecosystems, spring comes very late—August, even September. Spring and summer are greatly compressed at such high elevation. Spring comes and goes in a matter of weeks.
In Sequoia National Park, you can drive to a 7,500-foot trailhead, gaining more than 6,000 feet and losing nearly twenty degrees F. in temperature. You can then hit the trail for the 14,494-foot top of Mt. Whitney, losing another twenty degrees F. or so as you climb to the top of the highest peak in the continental U.S. Hikers pass a lot of “Spring” as they make one of America’s most classic climbs.
Flowering plants are not the only life forms following spring uphill. Bears emerge from hibernation, foraging at ever higher altitude to sniff out their vegetal preferences. Birds and bees and many more creatures thrive in spring, whenever and wherever they find the season.
So, if you want to prolong spring, hike higher and higher into the high country. Pause along the trail to admire the wide variety of flowering plants that adorn different elevations.
Hiking is something you can do at most any age and stage of life. Grandparents who take an active role in introducing their grandkids to the great outdoors are heroes in my book.
Grandparents can play a crucial role in getting kids on the trail, particularly in an era when parents are too busy to go hiking or disconnected from nature altogether. Older generations tend to be more comfortable in nature than younger ones and have more outdoor skills that they can teach kids.
(Parents: Tell YOUR parents to “take a hike”—with their grandkids of course!)
Grandparents have the opportunity for real quality time with their grandchildren. Away from phones, computers and video games, the two generations are likely to have some great walks and talks. Kids will bring things up on the trail in conversation with their grandparents that they won’t discuss back home with their parents.
Get started with a child-carrier-pack on your back. Faster than you think, the grandkids will be walking and excited about their hikes with grandpa and grandma.
By all means, if you have the means, sign up for one of those grandparent-grandkid hiking holidays. But grandparents need not spend big or travel far to take a hike. Find a state park or forest reserve nearby, inquire about the best trails for the grandkids in your charge, and off you go.
Make no mistake, taking a four-year old on a hike is challenge enough for college-aged camp counselors and 20-something and 30-something parents, much less 60-something and 70-something grandparents. But with the right planning—and especially with the right positive attitude—it can be done, and done in a way that adds up to a joyful and memorable experience for grandkids and grandparents alike.
Apart from the physical challenges that come from, well, getting older, the wisdom that comes from age gives grandparents certain advantages in taking kids on a hike.
Tips for Grandparents
• It’s the journey not the destination. Really, you don’t have to get to the top of the mountain. It’s about what you experience along the way. • Slow and easy. Don’t push kids too long and too far and make sure to take sufficient rest stops and snack breaks. • Yes-yes-yes not no-no-no. Be positive and avoid the don’t-do-this-don’t-do-that routine. Listen to them and be a little flexible about your time on the trail. • Teachable moments. When opportunities arise to impart some wisdom about hiking or the natural world, take advantage of the opportunity. Just remember you’re a grandparent not their science teacher. • Some challenge, please. A walk along a flat nature trail might be easy for you and the grandkids but not a very exciting adventure. Kids like climbing boulders, running up and down hills, splashing in creeks.
Hike on.
John McKinney
P.S. For more tips on enjoing the trail with your grandkids, check out Hike with Kids
Keep your children in sight at all times. That may seem obvious, but you’d be surprised how fast kids can get off the trail.
Repeat and repeat again all instructions ranging from snack breaks to porta-potty locations.
Choose a hike with fairly modest elevation gains. Children prefer intimate settings, such as a little creek or a clump of boulders to those vast scenic panoramas favored by adults.
Feed the Troops. Begin with a nourishing breakfast. Carry plenty of quick-energy snack foods and offer them frequently. (By the time kids tell you’re they’re hungry, they’re often already cranky and out of energy and enthusiasm.)
Supplement The Ten Essentials with extra snack foods, whistles (in case you and your child become separated), a book or toy for the drive to and from the trailhead.
Check your child’s temperature. While you’d think that kids would tell you if they’re too cold or too hot, they usually don’t. Dress them in layers and be sure to add or subtract clothing in response to changing weather conditions.
Teach respect for nature. Enjoy but don’t disturb flowers, plants and animals. Environmental education is easy and fun on the trail, so be sure to pack a good trail guide or nature guidebook and visit park interpretive centers.
When children travel in groups, the kids motivate each other to go farther and faster. And there’s lots less whining.
If young spirits sag, try playing games to regain good humor and maintain that all-important forward progress up the trail. With younger children, “play dog;” that is to say, throw an imaginary stick to the next tree en route and have them fetch it. “One-two-three-jump” is another popular game. With a parent holding each hand the child hikes along one-two-three steps, then jumps as parents raise arms and swing the hopefully-no-longer reluctant little hiker into the air. I Spy is another favorite trail game: “I spy with my little eye something that is….(fill in the blank).
It’s much better for everyone to stop frequently and travel slowly than to try to make the kids go faster and then have to carry them. If parents know what kids can and can’t do, everyone has a great time on the trail.
These tips make it more likely you will enjoy hiking with children. What’s more, they’ll enjoy it too!
For fans of falling water, California’s state parks offer a variety of intriguing waterfalls in all shapes and sizes. Some waterfalls are world-class attractions: President Theodore Roosevelt once proclaimed Burney Falls in McArthur-Burney Memorial State Park “the eighth wonder of the world.” Another showstopper is in Julia Pfeiffer Burns State Park, where magnificent McWay Fall tumbles from the Big Sur bluffs into the Pacific
Other state park waterfalls, from La Jolla Canyon Falls in Point Mugu State Park to Gold Dust Falls in Prairie Creek Redwoods State Park exhibit a more subtle beauty. With waterfalls, as in art, beauty is very much in the eye of the beholder. Falls tend to be as diverse as the parks themselves. Some thunder along all year, while others are very much seasonal affairs.
I’m sharing ten of my favorite falls in this post, but heads-up: I have ten more favorites—that I’ll reveal next Waterfall Season. Hike On!
Gold Dust Falls Prairie Creek Redwoods SP
Waterfalls near the coast are a rarity, so the presence of three of them in close proximity to the California Coastal Trail is a special treat indeed. Gold Dust Falls, a long, slender tumbler, spills some 80 feet to the forest floor. An unnamed waterfall is located just south of Gold Dust; another is located just north.
The Hike: An easy 2-mile round trip hike from Fern Canyon to Gold Dust Falls.
Burney Falls McArthur-Burney Falls Memorial SP
One of California’s natural wonders: Burney Falls in McArthur-Burney State Park
Not surprisingly, the falls was considered a “power spot” by the native people who lived in the region. Park visitors can feel the power by watching the 200 million gallons of water that tumble into Burney Creek Gorge. While many waterfalls exceed Burney Falls in height, few can match its grandeur–twin, thundering 129-foot falls, accompanied by numerous plumes of water.
The Hike: A short walk, peer over the railing and there it is. Admire the falls from different perspectives by hiking a mile or two on both sides of Burney Creek.
Rush Creek Falls South Yuba River SP
South Yuba River Waterfall
South Yuba Independence Trail offers wheelchair access and delightful passage for adventurers of all abilities to the charms of California’s Gold Country and some lovely waterfalls. Volunteers transformed a Gold Rush-era water ditch and wooden flumes into a whole access trail along the Yuba River.
Many-tiered Rush Creek Falls tumbles over polished granite. You can admire the spectacle from a gravity-defying flume above the tallest drop—about 50 feet.
The Hike: A pleasant, mile-long path crosses ravines by way of several wooden flumes to an elaborate wooden ramp that circles down to the edge of Rush Creek above the main fall.
Hot Spring Creek Falls Grover Hot Springs SP
Most visitors come to this out-of-the-way park to soak in the hot springs. Still, a jaunt on one of the park’s inspiring footpaths and a visit to the vigorous, 50-foot-tall waterfall on Hot Springs Creek, adds to the pleasure of a park known for its soothing pools.
The Hike: An easy 3-mile round trip hike from the park campground along Hot Springs Creek meanders amidst giant sugar pines to the waterfall.
Berry Creek Falls Big Basin Redwoods SP
Framed by five-fingered ferns, Berry Creek Falls is a real looker, the kind of waterfall that graces magazine covers. The beauty of the 70-foot waterfall contrasts with the walk to it—through fire-ravaged (but slowly and tenaciously recovering) redwood groves.
The Hike: Figure a 12-mile round trip hike from Highway 1 to reach the waterfall, as well as 60-foot Silver Falls and Golden Falls, which spills over a reddish-gold cliff. It’s about the same distance to reach the falls from park headquarters via Skyline to the Sea Trail.
Pfeiffer Falls Pfeiffer Big Sur SP
This park is quintessential Big Sur—redwoods and the Big Sur River, great camping and hiking. A lovely path leads under stately redwoods. Then you ascend astairway to an observation platform at the base of the falls. Pfeiffer-Redwood Creek cascades over a 40-foot precipice to a small grotto.
The Hike: An easy, family friendly 2-mile round trip hike leads from Big Sur Lodge to Pfeiffer Falls.
McWay Falls Julia Pfeiffer Burns SP
A redwood grove, dramatic Big Sur coastal vistas, and the only major California waterfall to cascade into the Pacific are some of this park’s attractions. From a well-designed overlook, you can observe slender but dramatic McWay Falls tumbling a hundred feet from the granite cliffs into McWay Cove.
The Hike: A 0.25-mile long, wheelchair accessible trail passes through a pedestrian tunnel under Highway 1 and leads to the overlook above McWay Falls.
La Jolla Canyon Falls Point Mugu SP
La Jolla Valley welcomes visitors with a native grassland, drifts of oak, a peaceful pond and, in spring, wildflowers and a lovely waterfall. La Jolla Creek runs most of the year and so does the falls, a 15-foot high tumbler with a modest pool at its base; the waterfall is most sprightly in spring.
The Hike: The waterfall is located a short mile up the trail at the second creek crossing from the park’s Ray Miller Trailhead.
Green Valley Falls Cuyamaca Rancho SP
The Sweetwater River cascades over granite boulders into series of pools. Rock slabs offer ideal sunning spots after wading in the cold water.
The Hike: From the Green Valley Falls picnic area, walk 0.25 mile along the Sweetwater River to a lovely series of low, but wide, cascades.
Borrego Palm Canyon Falls Anza-Borrego Desert SP
Borrego Palm Canyon is the third-largest palm oasis in California, the first site sought for a desert state park back in the 1920s, and home to a lovely waterfall. A 15-foot waterfall cascades over huge boulders into a damp grotto surrounded by a palm oasis. You might have to wait until the next rain. But heavenly!
The Hike: From the Borrego Palm Canyon Campground, a family-friendly, 3-mile round trip hike takes you along the park nature trail to the waterfall.
To stay on the trail, keep your eyes open when you’re hiking. Don’t be oblivious to your surroundings, lose the trail and expect to call 911; odds are the places where you’re likely to lose a trail are the same places with sketchy cell service.
Even if you’re in the middle or at the end of a group of hikers, pay attention to the trail and the terrain!
If you’re hiking so fast that all you see is your boots, you’re not attentive to passing terrain—its charms or its layout. STOP once in a while. Sniff wildflowers, splash your face in a spring. LISTEN. Maybe the trail is paralleling a stream. Listen to the sound of mountain water. On your left? On your right? Look up at that fire lookout on the nearby ridge. Are you heading toward it or away from it? LOOK AROUND. Paying attention is the best way to stay on the trail and the best insurance against getting lost.
Tips to stay on the trail
Watch for way-marks. Parks are marked with basic trail mileage signs and in many other ways, including blazes, disks, posts and cairns.
Be aware of your surroundings. Note passing landmarks and natural features. Stop now and then to compare your progress on the ground to the route on the map.
Think for yourself. Just because you’re in the middle or at the end of the line of hikers doesn’t mean you can switch over to autopilot and stop paying attention to where you’re going.
Eyes in the back of your head. Look behind you frequently. Knowing where you came from always gives you a better feel for where you’re going and prepares you for the return trip.
Put the trail into words. Sharing what you see and what you expect to see when with your trail companion can confirm whether you’re on the “same page” in regard to the hiking route. Two heads are better than one, four eyes better than two, when it comes to staying on the trail.
Here comes the sun. Use the east-rising, west-setting sun and its respective position to the trail to help you in your orientation.
It’s about time we talk about waterfalls and how to get more serious about waterfall safety. We know for sure we love waterfalls!
Maybe our love of waterfalls has something to do with the negative ions released as water thunders onto rock. Or maybe the droplets released into the air surrounding falls simply refreshes and renews us—another example of how nature restores our bodies, minds and hearts.
For whatever reason, we’re just crazy about waterfalls.
And I mean crazy.
Hike smart and safely enjoy the beauties of nature. The trail to Holy Jim Falls is a favorite of avid hiker Everett Rice.
Hikers, and a whole lot of non-hikers, read the raves and reviews about waterfalls online then make a beeline for them. Often they set out in sandals or poor footwear, without proper preparation, and without telling anyone of their intentions or itinerary.
As a result, increasing numbers of waterfall-bound hikers are going from Yelp to “Help!” These new or inexperienced hikes end up needing rescue, getting injured and even killed along the way to waterfalls and by poor decisions made when they make it to the base of waterfalls.
Trailmaster John McKinney (top R) has led hikes to lovely Eaton Canyon Falls, which should not be climbed but safely admired from the pretty pool at the bottom.
A safe visit to a waterfall is not complicated: Enjoy the view of a waterfall from the bottom, take inspiration from the scene and take the trail back. Do not climb the slippery stones to try to get to the top of the falls.
(Exceptions: Some waterfalls have good side trails that the hiker can follow to safe vista points at or near the top of them.)
Serious about Waterfall Safety
Recently after yet another round of lost and injured hikers heading for waterfalls in Southern California’s mountains, The Trailmaster was asked by several Los Angeles radio stations, including KPCC, to comment about why visiting a waterfall can be a fatal attraction.
I no longer assume hikers will know the right thing to do when arriving at a waterfall and am blunt with my warnings in my latest trail guides. Here’s a passage from HIKE the San Gabriel Mountains regarding waterfall safety:
To reach Eaton Falls, continue straight up Eaton Canyon wash. Rock-hop across the creek several times as you walk to trail’s end at the falls. (Don’t climb the falls; people have recently been injured and killed doing this.)
And here’s what I had to say about Tokopah Falls in HIKE Sequoia & Kings Canyon National Parks: As you near the falls, traverse boulder-strewn terrain on a well-engineered length of trail, then lift your eyes to behold Tokopah Falls. (Please don’t scramble up the steep and slick rocks in order to see more of the upper falls. You could slip and die.)
Simply put, a waterfall is beautiful, a hiker fall is anything but.
A day pack (or daypack if you prefer) is a soft frameless pack that attaches to your shoulders and usually includes a hip band or waist belt for support. A good, small hiking backpack will last a lifetime.
School backpacks are for books. Day Packs are for hiking.
High-quality day packs are made specifically for hiking so there’s no need to settle for a bike-bag, school backpack, laptop computer backpack or a pack fashioned for another sport. It’s best to purchase a hiking backpack at a specialty outdoors store.
Padding is crucial to a comfortable day pack. Padded shoulder pads are an absolute must, and go a long way in keeping the spring in your step. A good day pack has a padded back, as well. A wide, padded lumbar belt is important, too, because you want to try and put the weight on your hips and take it away from your neck and shoulder muscles.
Ten Features of a Good Day Pack
Durable weather-proof fabric
One-piece body construction
Padded shoulder straps
Padded back
Wide, padded lumbar belt
Sufficient pockets and compartments to suit your needs
Side pouch for water bottle
Strong buckles and straps
Storm flap-covered zippers
Strong top grab handle
Before you purchase a small backpack for hiking, put a little weight inside it and walk around the store. Check to be sure it really fits your frame. We hikers come in all shapes and sizes (and there’s major body differences between the sexes) so be assured that there’s no such thing as a one-size-fits-all day pack.
A modest-sized day pack measures about 16 inches high, 12 inches wide and about 6 inches deep. A larger day pack can be as 18 inches or more in length, 14 inches wide and more than 6 inches deep.
Day pack capacity is measured in cubic inches, with 1,000 to 1,500 cubic inches sufficient for most all-day adventures. If you’re the designated donkey in your hiking group or a parent toting gear for several kids, consider investing in a “weekend” day pack, a larger hiking backpack with a capacity of 2,000 to 3,000 cubic inches. (Europeans and other hikers around the world measure day pack capacity in liters. A typical day pack has between 15 and 30 liters of cargo room.)
With the Ten Essentials for Hikers, extra clothing, food, water, and a camera, figure that you’ll be toting 10 to 15 pounds of gear on a day hike. Sure you and your day pack can carry more weight, but remember you’re going day hiking not backpacking. Remember that the suspension systems of most small hiking backpack backs are not designed to support heavy loads so if you put too much weight in a day pack, that load will pull on your neck and shoulders and stress your frame.
Simple, sturdy, comfortable. For happy trails, get a quality day pack.
As a general rule, you can comfortably carry 10 percent of your body weight in a well-designed small hiking backpack. Consider 15 percent of your body weight or 25 pounds as an absolute maximum load, even with a superior day pack.
Some day hikers, particularly those who hike in warm weather, prefer packs with a built-in hydration system. Remember that you’ll be giving up some storage capacity and have to pack around the pack’s built-in bladder sleeve. Some hydration backpacks are all bladder and no backpack—with minimal carrying capacity for anything but fluids. Other hydration backpacks are a better balance between water and cargo toting capacities.
Fanny packs have their fans among day hikers. Buy a good one with ample padding and storage. Look for rugged, covered zippers and easy access to pouches. Be sure the pack you choose comfortably carries water bottles.
By now, on one hike or another, I’ve forgotten each and every one of the Ten Essentials for hikers.
And always regretted it.
I’ve left the trail map in the car. I can’t seem to remember to check the freshness of my headlamp batteries and I forget to replenish the supplies in my first-aid kit. When airport security confiscated my trusty Swiss Army knife out of my day pack, I assured myself I could do without a pocket knife for a week of day hiking. (Naturally, I needed it several times.)
How many essentials are there in the Ten Essentials for Hikers?
No, this isn’t a whimsical question like “Who’s buried in Grant’s tomb?”
Some hiking experts count 12 or even 14 essentials. And what about the day pack, essential to carry those essentials, shouldn’t that count as an essential? New hikers argue that a cell phone should be the eleventh essential while veterans insist it should be “common sense.” Some Ten Essentials for Hikers lists include matches and fire starter as two separate essentials, some count them as one essential. Some lists include water, some don’t. Items that usually finish just out of the top ten but that are considered essential by some hikers include signaling devices (whistle and mirror) and insect repellant.
A Ten Essentials for Hikers list was first circulated in the 1930s by The Mountaineers, an outings club located in Seattle. Since then it has become a kind of gospel among hikers and an essential teaching tool in outdoor education programs.
1. Map
Even if you’re positive about where you’re headed and how to get there, it’s wise to bring a map with you on the trail. GPS maps are great, and consider a paper map back-up.
You can find good trail maps at specialty outdoors stores, travel bookstores and a number of on-line outlets. Use care when you select a map off the rack. Many maps sold to tourists are okay for civic sightseeing, but don’t show the backcountry in the kind of detail we hikers require.
Maps in trail guidebooks and from local and regional park authorities vary in quality from great to abysmal. Funky hand-drawn maps or poor-quality reproductions are indicators that you should purchase additional maps of the region in which you intend to hike.
Forest Service maps are available at ranger stations and various commercial outlets for a small fee. They’re general maps, showing roads, rivers, and trails. The Forest Service usually keeps its maps fairly up-to-date.
Topographic maps show terrain (elevations, waterways, vegetation and improvements) in great detail.
2. Compass
A compass and map go hand in hand. Once you figure out how to use them together, you’ll find yourself hiking around the backcountry with increased confidence. Add (but do not substitute) a GPS unit to your hiker navigation system. Some of the features to look for in a good compass: • One that registers 0 to 360 degrees with two-degree increments • Liquid filled to protect the magnetic needle and reduce fluctuation • Adjustable declination to be able to adjust for the difference between magnetic north and true north • A base plate that can be used as a straight-edge for determining distances on maps • A pop-up mirror for making sightings
Okay, I admit it, I do love the Compass in my iphone.
3. Water
“Drink before you’re thirsty” should be the hiker’s mantra. Bring plenty of water for your hike, plus some extra. And drink it! As ridiculous as it sounds, The Trailmaster has observed many hikers who remember to pack water, but don’t take the time to drink it.
Try to bring your entire water supply for the day with you so that you don’t have to rely on trailside streams. It’s still possible in some locales to drink from a very select number of backcountry creeks and springs without ill effect, but each individual water source should be carefully scrutinized.
With a few exceptions, I reluctantly advise: Don’t drink untreated water. Many hikers assume water is pure, and then, 48 hours later, get a queasy feeling that tells them their assumption was wrong. Even clear-looking waters may harbor the organism Giardia lamblia, one of the causes of “traveler’s diarrhea.” Treat any backcountry drinking water with purification tablets and/or a quality filter.
4. Extra Food
Don’t be shy about bringing more than you think you might eat. Your hunger—or the day’s plans—may surprise you, and you’ll want to be prepared.
On a day hike, weight is rarely an issue, so you can pack whatever you wish. Remember to pack out what you pack in. The day you hike is not the day to diet. Calorie counters rejoice: There’s a lot of calorie burning on a hike and quite an energy cost. You’ll need all your strength, particularly on steep grades. Energy bars, Gorp, or trail mix, with fruit, nuts, raisins, and M&M’s are good high-octane fuels. A sandwich, fruit and cookies make a good lunch. A continental spread featuring sourdough bread, a fine cheese and a splash of chardonnay is also nice.
Snack regularly and avoid a big lunch. Exertion afterward sets up a competition between your stomach and your legs and your legs lose, leading to weakness and indigestion.
5. Extra Clothes Wherever you travel, there’s a good chance you’ll encounter some old-timer who loves the old adage, “If you don’t like the weather in (pick a region), then wait five minutes.” It almost doesn’t matter where you’re hiking, the weather often changes quickly and with little warning. The trick is to be prepared.
If you start out on a warm sunny morning, dress accordingly (t-shirt, shorts), but bring along a long-sleeved button-down shirt, pullover and a pair of lightweight pants. Vice versa, of course, if it’s cold. The extra shirt is especially nice when stopping or sitting down to rest on the trail. It’s surprising how chilly you can get when you stop moving, particularly when you’re in dry weather, windy places, or at high altitude.
Extra clothes also come in handy after an unexpected fall into a creek or on a wet, muddy trail. Depending on the climate, dry clothes might be the key to saving an otherwise lousy hike. 6. First-Aid Kit While you don’t need to lug along your entire medicine cabinet, there are a few essential items that will make any trip much safer and more comfortable. It’s important to be prepared for a range of mishaps: blisters, cuts, scrapes, sprained ankles, among other things. • A small assortment of adhesive bandages in various sizes. • Antiseptic towelettes • Antibiotic ointment • Sterile dressing a small roll of adhesive tape for larger cuts • Antihistamine and ibuprofen tablets for allergies and aches • Anti-diarrheal tablets (not a necessity, but if you need them will make your trip a whole lot more pleasant) • Moleskin, for blisters • Ace bandage—really helpful in the event of a sprained ankle • A couple of safety pins. These can help with the oddest of medical and non-medical mishaps—a torn t-shirt, a broken zipper, you name it. • Some hikers swear by homeopathic products such as Rescue Remedy cream, tincture or tablets, and arnica for aches and bruises.
Larger injuries are less common on the trail, and for those, I suggest you consult a more comprehensive first-aid manual.
7. Pocket knife
From slicing salami to cutting an ace bandage to rigging emergency shelter, a pocket knife is an indispensable tool on any hike. Knives really run the gamut of price, utility and style, and you can find yourself paying as little as five or as much as $70 for one of these gadgets. Almost any pocket knife will do on a day hike, as long as you keep these criteria in mind: your knife must be clean, sturdy, and sharp.
Few know basic wilderness preparedness as well as the Boy Scouts—and The Official Boy Scout Handbook offers guidelines for caring for your knife that are worth noting: • Keep your knife clean, dry and sharp at all times • Never use it on things that will dull or break it • Keep it off the ground. Moisture and dirt will ruin it. • Wipe the blade clean after using it • Treat the joints to an occasional drop of machine oil so that the blades will keep opening easily.
Keep your knife sharp by using a sharpening stone. You can find these at most hardware stores. Sharpening a knife is not rocket science; learn how to maintain a sharp blade and keep this vital hiker tool in tiptop shape.
8. Sun Protection No matter where you live, or what season it is, hikers need to take precautions against the hazards of the sun’s rays. Overexposure can leave you fatigued, dehydrated, and painfully burned. A combination of a hat, sunglasses, sunblock and the right clothing can keep you properly protected from the dangers of too much sun.
It’s important to be extra sun-savvy when hiking in high altitudes, long stretches of un-shaded or reflective terrain(on sand dunes or near water, for example), and when the sun is at its most intense—roughly between the hours of 10 and 2.
9. Flashlight
Although you may have no intention to stick around on the trail past sunset, it’s still a good idea to carry a flashlight or headlamp every time you head out for a hike. It’s easy to underestimate just how long a particular hike might take, and you might find yourself scrambling down the mountain as dusk approaches. Without a light source, you’re far more likely to lose your way, take a fall, or worse, panic.
Many seasoned hikers have stories about getting stuck on the trail after dark. And most will tell you that packing a flashlight is a classic case of “better safe than sorry.”
It’s easy to bring one with you. A light can be inexpensive, lightweight, and—if you bring along a set of extra batteries—pretty reliable. Headlamps are now more popular than ever. They’re just as good (or better) than regular flashlights, and they have the added benefit of allowing hands-free illumination.
Because of vastly improved battery technology and capacity, as well as compact and powerful electronics, the flashlight is one “essential” that’s been greatly improved over the years.
Be sure the flashlight selected throws a strong enough beam to light up a trail in total darkness. Check with store clerks (or read-up online) about beam-strength. Many cheaper lights may be great for nighttime reading, but won’t help you navigate a dark trail. Some lights, boast a high-intensity beam that can adjust from “spot” to “flood”, or from a bright, focused point of light to a wider, slightly dimmer beam—kind of like the zoom lens on a camera. All of the best ones are waterproof. So if you get stuck in the dark when it’s raining, you’ll be able to find your way. 10. Matches and Fire-starter
The traditional fire-starter is foolproof kindling for starting emergency fires in the wilderness.
More often these days a strike fire starter has and alloy rod and a stainless steel striker that produces a very high temperature spark.
Then of course, there is, a box of matches. It’s best to buy the waterproof or “stormproof” variety for trips on the trail.
Joshua Tree National Park beckons hikers with pathways leading to a diversity of desert environments, including sand dunes, native palm oases, cactus gardens and jumbles of jumbo granite.
Joshua Tree is a great place to take a hike. And there’s a lot of park to hike!
Joshua Trees (and so much more!) on the trail in Joshua Tree National Park.
JT is a large national park, slightly larger than Yosemite in fact, with compelling sights-to-see scattered over nearly 800,000 acres. With elevations that range from 900 feet to more than 5,000 feet, the park has a great deal of biodiversity as well.
With limited time, it’s best to choose a strategy to explore Joshua Tree. One approach is to focus on one area per visit: Cottonwood Springs, Black Rock Canyon or the Wonderland of Rocks for example. Another way to go is to choose one route of travel—say from the West Entrance or North Entrance—and stop for hikes along major park roads.
Another strategy to employ is to take a lot of short hikes. The park has a dozen interpreted nature trails ranging from 0.25 mile to 1 mile in length. They travel over gentle terrain and offer an ideal introduction to the wonders of the desert.
In combination with stops at the park visitor centers, the park’s nature trails deliver an excellent overview of the park. Taking several short hikes in a day is a good way to go for the first-time visitor as well as for those new to desert hiking, and who may be unfamiliar with its rigors and requirements.
“JT is one of my favorite places to hike,” declares Trailmaster John McKinney, seen here on the trail in the Keys View area of Joshua Tree National Park.
In Joshua Tree, hikers have the opportunity to experience two deserts: the Mojave and the Colorado. The Mojave Desert in the western part of the park includes Joshua tree forests and some intriguing geology—particularly the dramatic hills of bare rock, usually broken up into loose boulders. Along with the Joshua trees that dominate the open spaces, the park also holds enclaves of pinyon pine, California juniper and the desert scrub oak.
Below 3,000 feet, the eastern part of the park reflects the Colorado Desert—with habitats of creosote bush, ocotillo, yucca and cholla cactus. This lower and drier desert features cactus gardens and dunes, plus palm oases, where water occurs naturally year-around and the native California fan palm thrives.
Paths to palm oases are one of the park’s special attractions. Oasis Visitor Center is located alongside the Oasis of Mara, also known as Twenty-nine Palms. For many hundreds of years Native Americans lived at “the place of little springs and much grass.”
Cottonwood Spring, near the south end of the park is a little palm and cottonwood-shaded oasis that attracts desert birds and bird-watchers. The trail to Fortynine Palms Oasis winds up and over a hot rocky crest to the dripping springs, pools, and the blessed shade of palms and cottonwoods. Lost Palms Oasis Trail visits the park’s premier palm grove.
No visit to JT would be complete without a short hike into the Wonderland of Rocks, twelve square miles of massive jumbled granite. This curious maze of stone hides groves of Joshua trees, trackless washes and several small pools of water.
Hikers often cross paths with rock-climbers and spot them practicing their craft on formations high above the desert floor. From Hidden Valley to the Wonderland of Rocks, the park has emerged as one of the world’s premiere rock-climbing destinations. The park offers relatively easy access to about 3,000 climbing routes, ranging from the easiest of bouldering to some of the sport’s most difficult technical climbs.
The Jumbo Rocks area is Joshua Tree National Park to the max: a vast array of rock formations, a Joshua tree forest, the yucca-dotted desert open and wide. Check out Skull Rock (one of the many rocks in the area that appear to resemble humans, dinosaurs, monsters, cathedrals and castles) via a nature trail that provides an introduction to the park’s flora, wildlife and geology.
In Queen Valley, just west of Jumbo Rocks, is the signed beginning of Geology Tour Road, a rough dirt road (four-wheel drive recommended) extending 18 miles into the heart of the park. Motorists get close-up looks at the considerable erosive forces that shaped this land, forming the flattest of desert playas, or dry lakebeds, as well as massive heaps of boulders that tower over the valley floor. Good hikes begin off Geology Tour Road, which delivers a Joshua tree woodland, an historic spring, abandoned mines and some fascinating native petroglyphs.
One of my favorite footpaths is Black Rock Canyon Trail, which follows a classic desert wash, then ascends to the crest of the Little San Bernardino Mountains at Warren Peak. Desert and mountain views from the peak are stunning.
Must-do classic hikes include the short but steep ascent through a lunar landscape of rocks and Joshua trees to the top of 5,470-foot Ryan Mountain. Reward for the climb is one of the park’s best views. Lost Horse Mine Trail visits one of the area’s most successful gold mines, and offers a close-up look back into a colorful era, and some fine views into the heart of the park.
Hike smart, reconnect with nature and have a wonderful time on the trail.
Hikers might be surprised as non-hikers to learn that there are more than two dozen different kinds of hiking trails. Many of the terms will be familiar to the veteran hiker while a few are terms only land use planners could love.
access trail: Any trail that connects the main trail to a town, road, or another trail system.
backcountry trail: A primitive trail (can be open to motorized or nonmotorized users) in an area where there are no maintained roads or permanent buildings.
connecting or side trail: Provides additional points of access to major trails—in particular the nation’s national recreation, scenic, or historic trails per the National Trails System Act.
destination trail: A trail that connects two distinct points (a trailhead and a point of interest) the destination. The trail user returns by the same route.
directional use trail: A path designed in such a way as to encourage hikers to travel in one direction.
feeder trail: A trail designed to connect local facilities, neighborhoods, campgrounds, etc. to a main trail.
extended trail: Trails over 100 miles in length (as defined in the National Trails System Act).
hiker-biker trail: An urban paved trail designed for use by pedestrians and bicyclists.
hiking trail: Moderate to long distance trail with the primary function of providing long-distance walking experiences of a mile or more (often much more).
interpretive trail (nature trail): Short to moderate lengthtrail (usually ¼ mile to 1 ½ miles long) with the primary function of providing an opportunity to walk and study interesting or unusual plants or natural features at user’s pleasure. Interpretive signs or numbers corresponding to descriptions in a pamphlet often provide information about features found en route.
fire road: Unimproved dirt road that allows fire fighting and ranger vehicles access to the backcountry.
frontcountry trail: Less emphasis is put on minimizing contact with signs of the civilized world. The main objective is to provide enjoyable trail experiences within the vicinity of developed areas by utilizing the scenic and interpretative features of semi-urban, rural, and natural environments.
long distance trail: In general a trail best characterized by length (more than 50 miles), linearity (follows a linear feature), and diversity (geographic and political).
loop trail: Trail designed so that the route is a closed circuit connecting a number of points of interest, giving hikers the option of not traveling the same section of trail more than once on a trip.
multiple-use (multi-use) trail: A trail that permits more than one user group at a time (equestrian, hiker, mountain bicyclist, etc.).
out-and-back trail: A one-way trail on which you travel to a destination then backtrack to the trailhead.
rail-trail: A multi-purpose public path (paved or natural) created along an inactive rail corridor.
recreation trail: A trail that is designed to provide a recreational experience.
side trail: A dead-end trail that leads to features near the main trail.
single-track trail: A trail only wide enough for one user to travel. Requires one user to yield the trail to allow another user to pass.
single-use trail: One that is designed and constructed for only one intended use (i.e. hiking only).
spur trail: A trail that leads from primary, secondary, or main trails to points of interest such viewpoints and campsites.
trail: Route on land with protected status and public access for recreation or transportation purposes such as walking, jogging, hiking, bicycling, horseback riding, mountain biking, and backpacking.
way trail (social trail): Unplanned/unauthorized trail that develops informally from use and not designated or maintained by a governmental agency. A good way trail might lead to a pleasant off-the-main trail surprise; a bad way trail is one made by hikers who cut switchbacks.
Wonder View Trail leads to the 1,820-foot summit of Cahuenga Peak, high point of the Hollywood Hills. The narrow and steep path (a true hiker’s route) continues to nearby Mt. Lee, which hosts the famed HOLLYWOOD Sign.
This trail is sure to become increasingly traveled with the recent closure of the Beachwood Dive trailhead, for many years the most popular way to hike to the HOLLYWOOD Sign.
Wonder View Trail: From Wonder View Drive to Cahuenga Peak is 2.4 miles round trip with 900-foot elevation gain; to Mt Lee is 3.2 miles round trip
Visitors from across the nation and around the world take a hike to the famed Hollywood Sign.
In 2010, hikers and movie fans from across the nation and around the world were delighted to learn that creative conservation efforts, combined with fundraising from private and public sectors, succeeded in purchasing the peak and adding it to Griffith Park.
As the story goes, Cahuenga Peak piqued the interest of aircraft mogul (and movie producer) Howard Hughes, who purchased it in the 1930s with the intention of building a mountaintop love nest for Ginger Rogers. She turned him down and the property remained undeveloped (a minor miracle in SoCal) until 2002 when a group of Chicago developers bought the land from the Hughes estate.
When the developers announced plans to subdivide the peak into luxury estates, local conservationists, film fans, and celebs rallied to “Save the Peak.” Some $12 million was raised to purchase the 138-acre site. Hollywood notables, including Steven Spielberg and Tom Hanks, plus the Tiffany & Company Foundation, Hugh Hefner and Aileen Getty contributed serious cash, as did state and local agencies.
As the story goes, Cahuenga, which names a pass, a peak and nowadays a boulevard was once a native Shoshone village located on the banks of the Los Angeles River near present-day Universal City. The peak is the 12th highest in the Santa Monica Mountains.
DIRECTIONS
From Highway 101 in North Hollywood, exit on Barham Boulevard and head north 0.3 mile. Turn right on Lake Hollywood Drive and continue 0.5 mile to intersect Wonder View Drive (which has no street parking). Park alongside Lake Hollywood Drive.
Cahuenga Peak by Mark Chumley (click to enlarge)
THE HIKE
Walk 0.25 mile up paved Wonder View Drive to its end. Hike past a yellow vehicle gate on dirt road 300 feet to unsigned Wonder View Trail on your right. Begin a steep eastward ascent east, zigzagging up the south slope of Cahuenga Peak. Enjoy wonderful views of Mt. Lee with its forest of antennae, Griffith Observatory, Mt. Hollywood and downtown L.A.
Walk to the Wisdom Tree in a less-traveled part of Griffith Park.
After a quite aggressive half-mile climb the rough trail gains a ridgeline and splits. A short side trail leads left to a lone pine tree and the top of Burbank Peak (1,690 feet). Pause to read the summit logbook stashed below the Wisdom Tree; hikers have been know to get very creative with their philosophizing in this book. Clear-day panoramic views are terrific—particularly angles on the San Fernando Valley and San Gabriel Mountains.
Return to Wonder View Trail and hike across a ridge. The path drops to a saddle between Cahuenga Peak and Mt. Lee (1,680 feet) and ends at Mount Lee Road. Turn right and walk up the paved road for a view through chain-link fence at the HOLLYWOOD Sign.
Hike on.
John McKinney
For more great hikes, check out my new guide, Hike Griffith Park & the Hollywood Hills.